On May 13, 2024, VMware announced that its virtualization software, "VMware Workstation Pro" and "VMware Fusion Pro", is now free for personal use.
VMware Workstation Pro is for Windows and Linux,
while VMware Fusion Pro is for Mac.
Macs with Apple Silicon chips such as M1 or M2 can use the latter.
This guide confirms that Ubuntu can be installed and run.
In this article, we’re installing Ubuntu Server.
Downloading VMware Fusion Pro
Register with BROADCOM
Even for the free version, registration is required.
Start by creating a Broadcom account.
Download and install Fusion Pro
Download Fusion Pro from the following page, selecting your preferred version.
You’ll be asked whether it's for personal or commercial use during installation.
https://support.broadcom.com/group/ecx/productdownloads?subfamily=VMware+Fusion
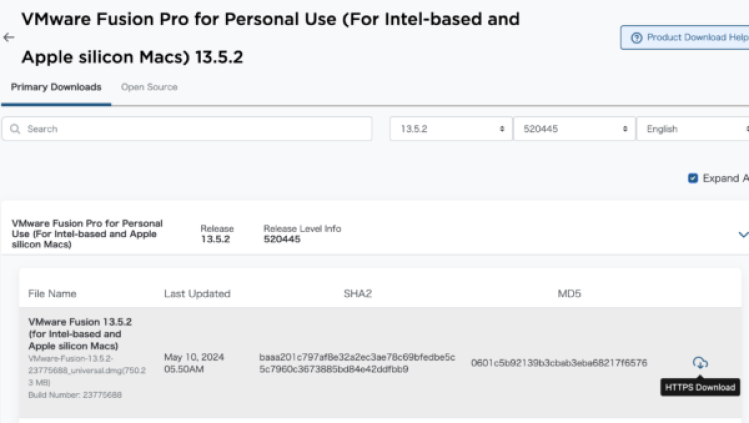
After selecting a version and opening details, you’ll see a screen like the one above.
Click HTTPS Download to start downloading.
⚠️ Depending on the time of day, you might encounter loading issues or failed downloads.
(This usually happens shortly after the free version is released.
Nighttime tends to be busy, so morning hours are better for smooth downloads.)
Once downloaded, proceed with the installation.
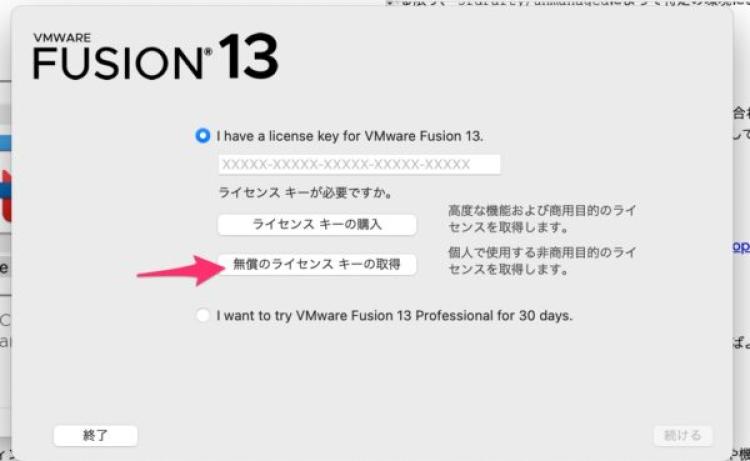
During setup, you’ll be asked whether the use is personal or business-related.
(Free version is for personal use only.)
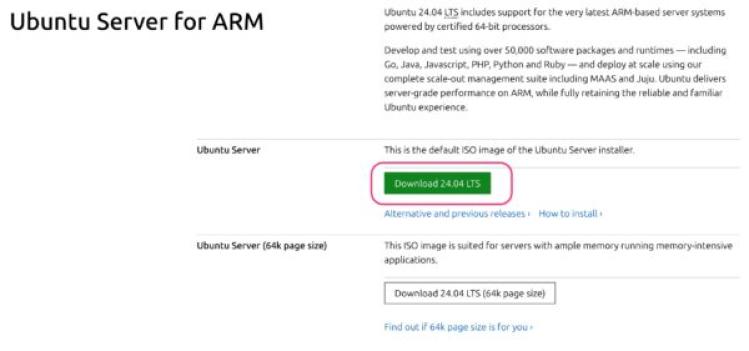
Download Ubuntu Server for ARM ISO
Download the ISO for Ubuntu Server for ARM from the following site:
https://ubuntu.com/download/server/arm
Launch Ubuntu Server with VMware Fusion Pro
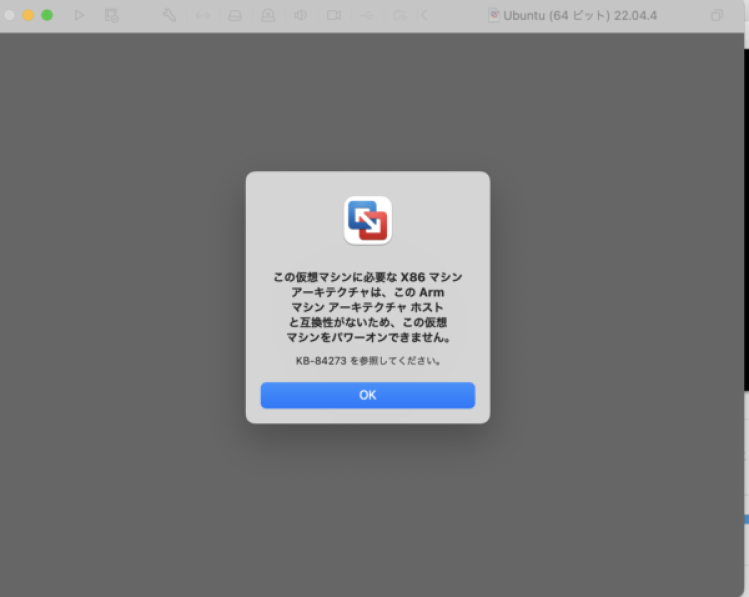
Failure example
❗Let’s start with a failed attempt.
Clicking “Install from disc or image” and selecting the downloaded ISO
will result in an error.
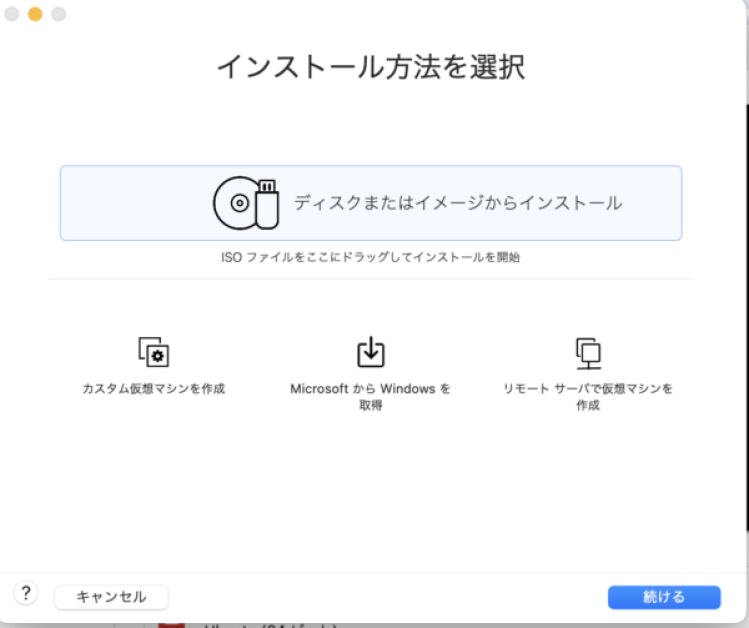
This virtual machine requires an x86 machine architecture,
which is incompatible with the ARM host. You can’t power it on.
See KB-84273 for reference.
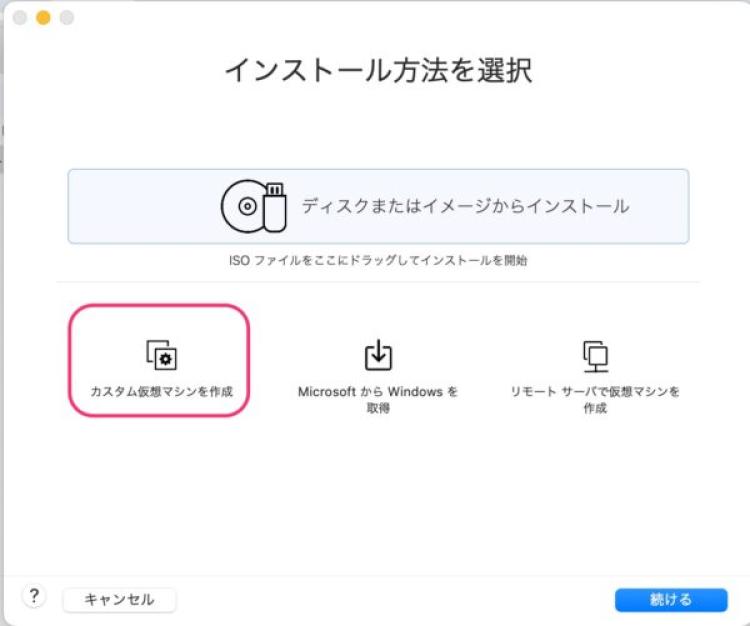
Successful method
Instead, choose
"Create a custom virtual machine" from the install options.
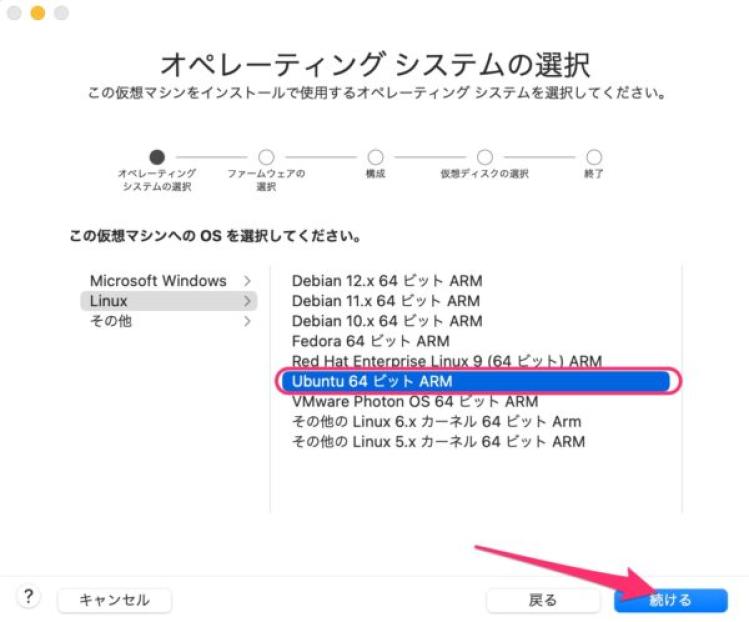
Then, under OS selection, choose Ubuntu 64-bit ARM.
Go to the settings at the top of the screen and click CD/DVD.
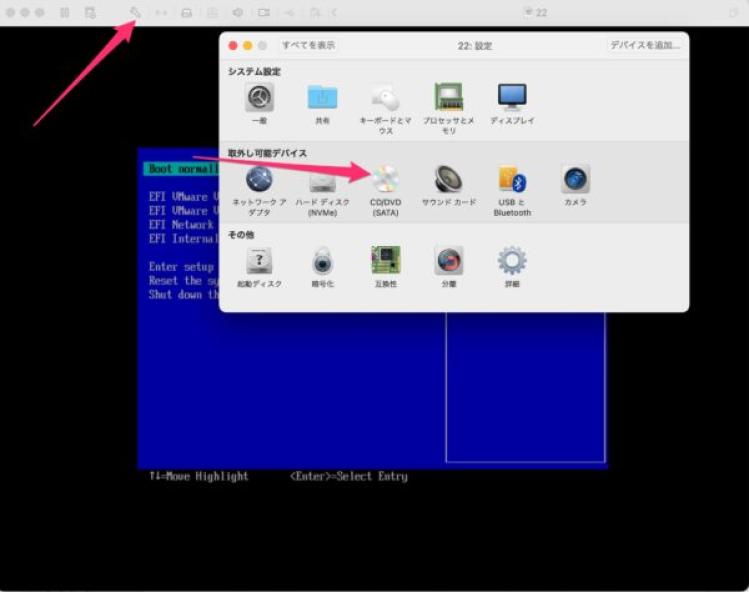
Select the downloaded ISO for the CD/DVD, then click
Connect CD/DVD Drive.

Next, in the same settings menu, click Startup Disk.
Select the ISO under CD/DVD and reboot.
This will boot from CD/DVD on the next launch and begin the Ubuntu installation.
You can also change the boot order in BIOS if needed.
(Resetting to defaults is easy, so feel free to try.)

The installation will now proceed.
Depending on your needs, you can mostly proceed with default settings.
At the package selection screen, it may be helpful to install some components in advance.
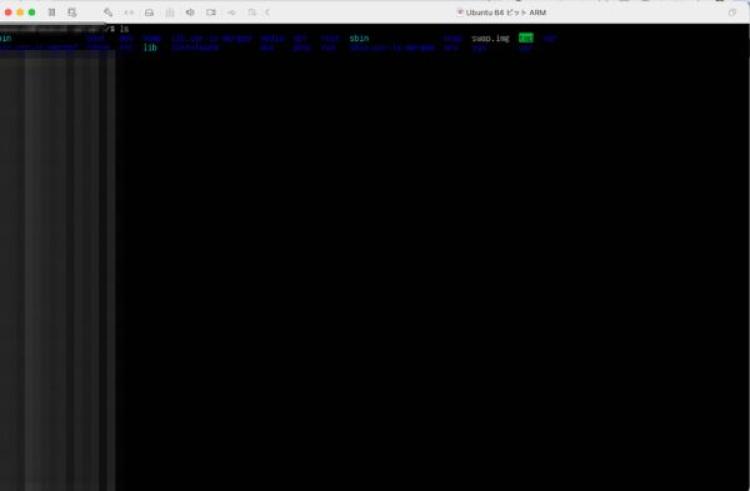
Ubuntu was successfully installed and launched.
References
https://blogs.vmware.com/teamfusion/2024/05/fusion-pro-now-available-free-for-personal-use.html